How to Install a Carpet Runner on Stairs like a DIY Pro
Before the pandemic, I had no idea how to install a carpet runner on stairs. Surprisingly, this seemingly tricky DIY project turned out to be beginner-friendly. Here’s our step-by-step guide to completely transform your stairs in a matter of days.
The pandemic forced us indoors, and during that time, my daughter and I started noticing things that needed updating in our Cape Cod home. We both agreed that the most dire upgrade was the dark, dingy carpet on the basement stairs.
The carpet was installed decades before we bought the house, and it showed. There were mystery stains throughout (gross, I know), and the carpet was even detaching from the stairs in some places. It was time for a change.
We researched possible solutions, like installing a new carpet, adding a runner, or refurbishing the wood stairs. Ultimately, we settled on a stair runner because it offers a high-end look at a low-end cost.
Here’s our super easy guide on how to install a carpet runner on stairs in just one weekend.
Natural Fiber vs. Synthetic Fiber
When it came to materials, we wanted an organic texture and light, neutral color to enhance the coastal design of our beach home. Jute and sisal came to mind. Natural fibers like sisal are durable (ideal for high-traffic areas), cost-effective, and eco-friendly.
However, sisal is also hard to clean, slippery, and bulky.
To solve for this, we found a company called Sisal Carpet that makes organic-looking nylon runners. Synthetic fibers are durable, easy to clean, soft on the foot, and simple to install because they are not as stiff as natural fibers.
We love that synthetic sisal is woven from 100% recycled materials like fishing nets and old carpets, which reduces waste during production. The fibers are woven to create patterns very similar to natural fibers.
Selecting a Carpet Runner
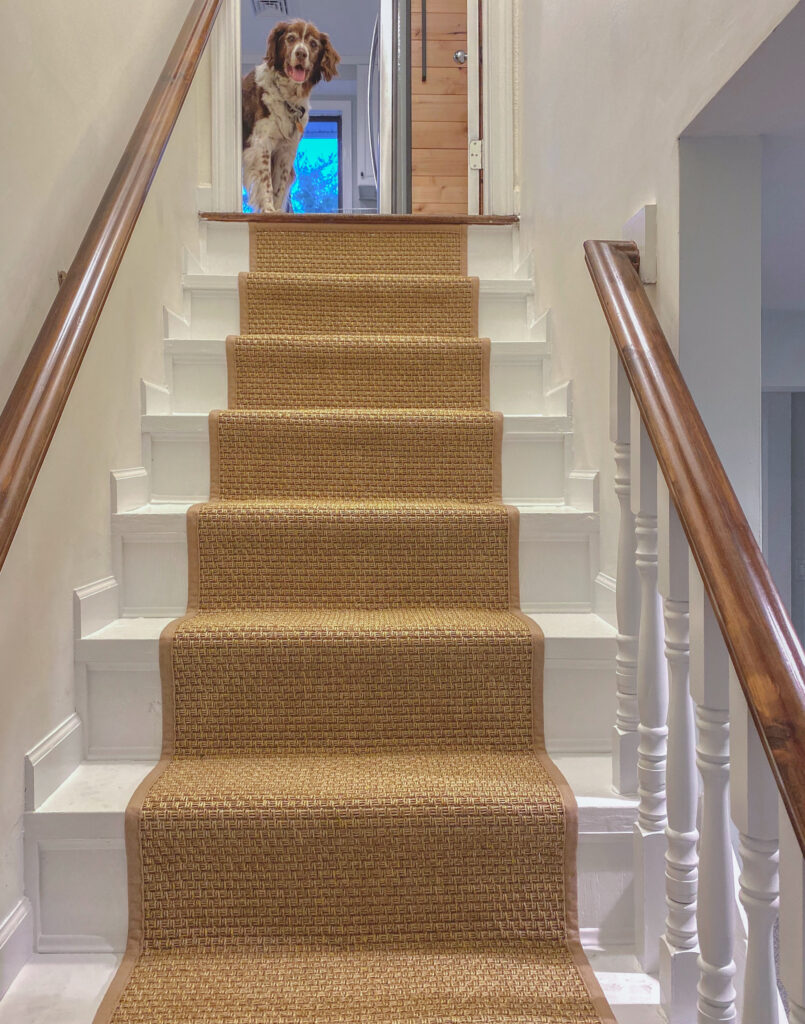
We chose the synthetic sisal material called “SYNSISAL” in the pattern LANGLEY, which looks almost identical to real sisal. Trust us, we’re picky when it comes to natural fibers and even we were impressed by the look and feel of this material.
SisalCarpet.com
SYNSISAL Carpet in “Langley”
Synthetic sisal material made from 100% recycled post-consumer waste.
Sisal Carpet allows customers to customize every detail of their runner, from the color to the dimensions and border. We selected the color “Honey” and added a UV Stabilized Polyester border in “Champagne.” We opted for the polyester border because it looks almost identical to cotton and is super durable.
Keep in mind, the lead time for this carpet runner is around 4 weeks, so it’s a perfect opportunity to start prepping the staircase.
How to Install a Carpet Runner on Stairs
1. Remove the Old Carpet
This first step only applies if your stairs are carpeted. Otherwise, move on to step two.
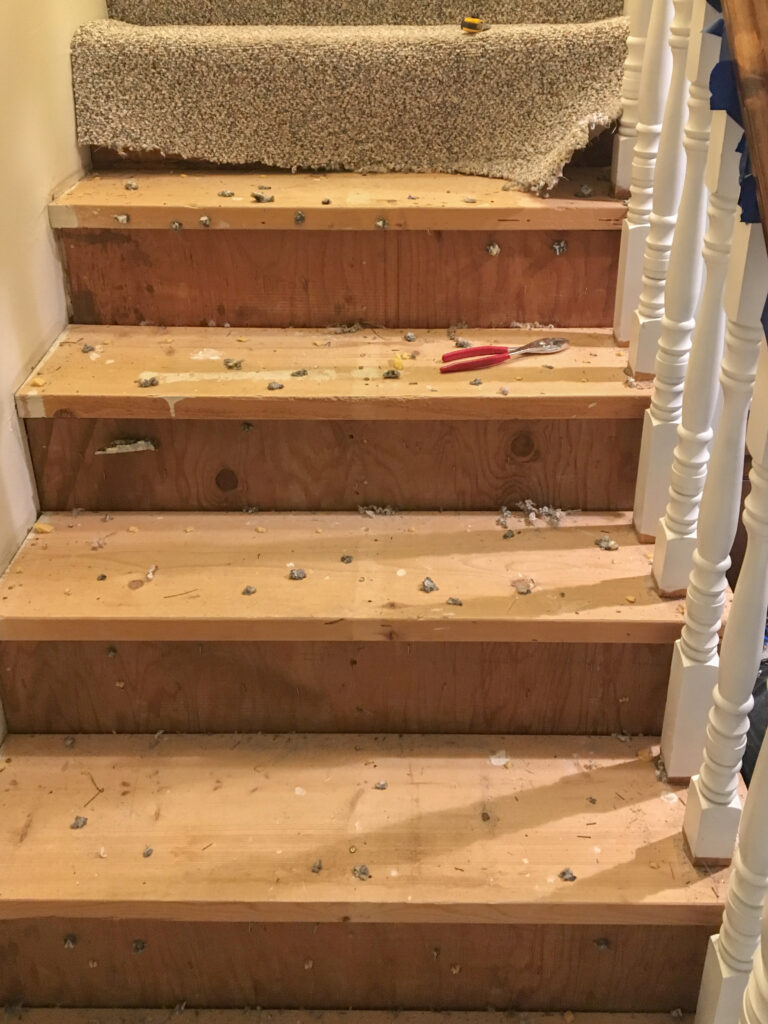
To remove the old carpet, you’ll need pliers and a flat screwdriver. We started at the bottom of the stairs, pulling the carpet with the pliers. As we progressed upwards, we used the screwdriver to remove the old staples and foam underneath. The process is simple and repetitive, but it requires time. Be sure to take breaks as needed.
Amazon
Craftsman Joint Pliers
2. Order the Materials
Once we removed the carpet and cleaned the stairs, it was time to measure the carpet dimensions. The standard carpet width for stairs up to 40 inches wide is 26 to 27.5 inches.
Since our stairs are exactly 40 inches wide, we used painter’s tape to mark 26 inches, 27 inches, and 28 inches directly on the stairs to see which option we liked the most.
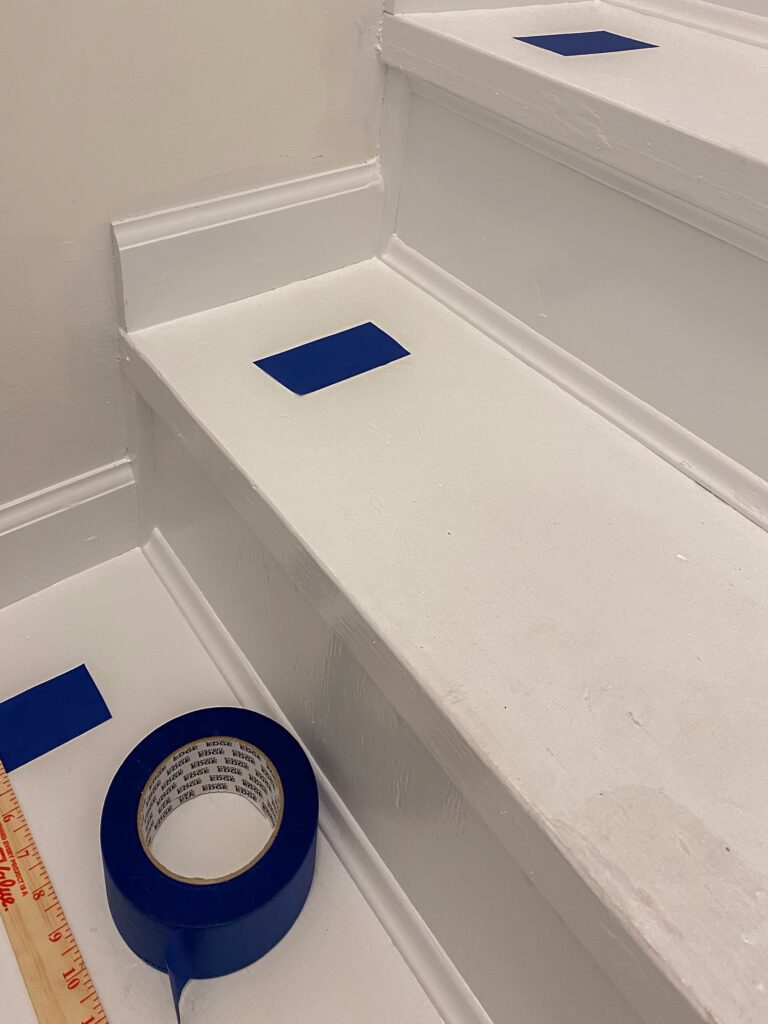
We opted for the widest option (28 inches) since it covered more of the old stairs. If your stairs are in better shape than ours, you could get away with 26-27 inches. Next, we needed to determine the length of the carpet.
We started at the top of the staircase and used a measuring tape to measure the first riser. Then, we measured the tread below. Finally, we measured the overhang under the stair nosing and repeated that process until we reached the end.
We did this two more times to ensure we got the measurement right! Somehow, we still ordered too much (oops), but at least we had enough material to finish.
Amazon
Scotch Blue Painter’s Tape
Amazon
Craftsman Measuring Tape
Once we determined our measurements for the carpet (2 feet 4 inches wide x 18 feet 3 inches long), we placed our runner order on sisalcarpet.com and moved on to step three.
3. Paint and Sand the Stairs
While we waited for our runner to arrive, we worked on the stairs.
First, we prepped the staircase for paint. We lightly sanded the areas that the runner wouldn’t cover with 120-grit sandpaper.
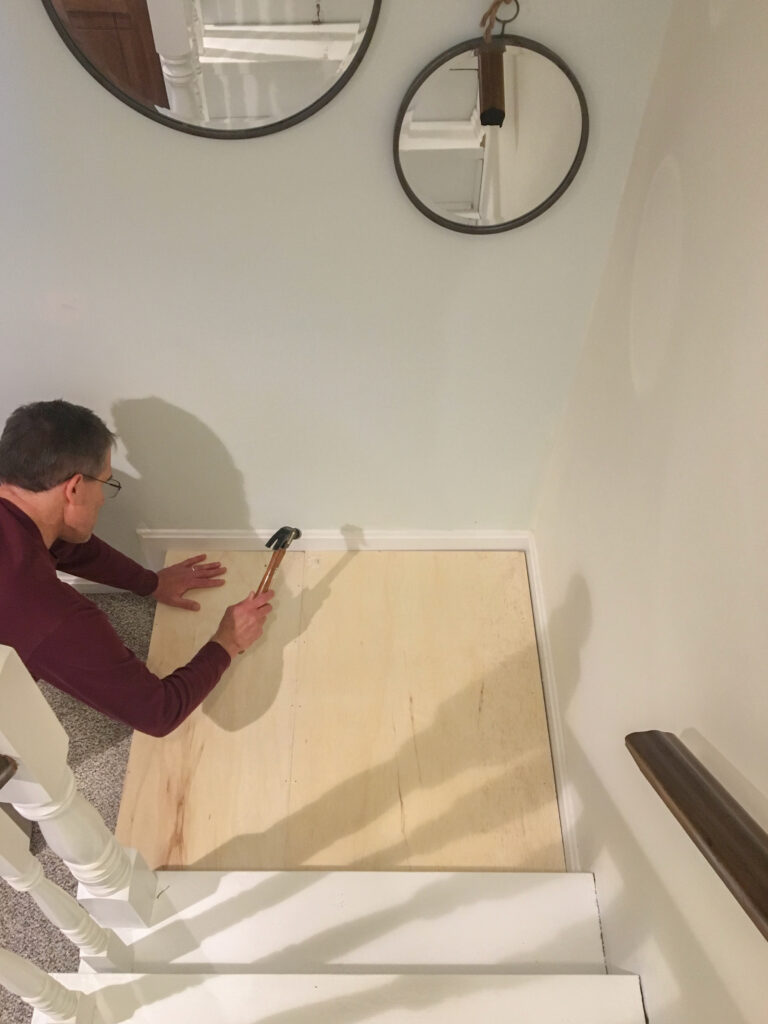
Next, we moved on to the landing of the stairs. We ensured all the gaps were filled with wood putty and lightly sanded the surface with the same sandpaper.
Finally, we primed half the staircase with a 2″ angled paintbrush, let it dry, and then primed the other half. We repeated the same steps with the paint twice, letting the paint dry overnight in between coats.
For paint and primer, we used “Simply White” in Semi-Gloss by Benjamin Moore and Fresh Start Primer by Benjamin Moore.
Amazon
Handy Paint Pail
Amazon
Purdy 2″ Angled Paint Brush
4. Optional: Add Molding
Before adding the runner, our basement steps needed a little more TLC. We decided to add detail molding to elevate the look of the staircase. We used a brad nailer and 3/4 inch unfinished molding to frame the risers and landing of the stairs.
In hindsight, we should’ve added the molding before priming and painting the stairs, but it didn’t occur to us until after. It definitely would’ve saved us hours of additional work.
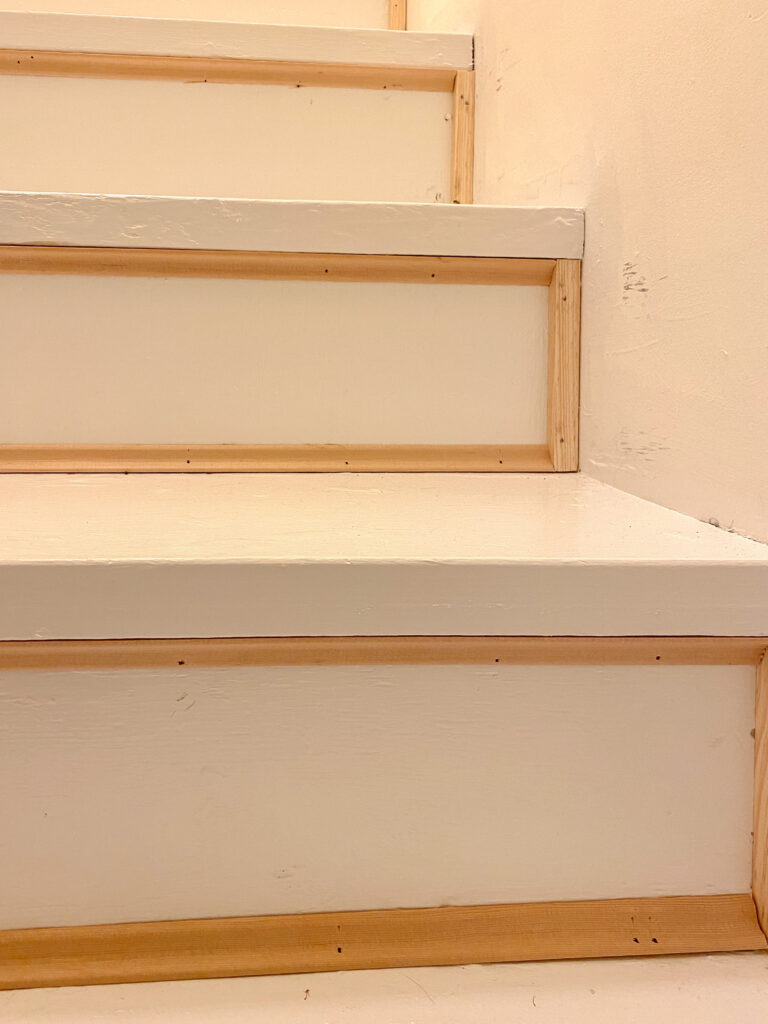
Once all the molding was installed, we used wood putty to fill the holes and sanded the molding with 220-grit sandpaper. Finally, we primed and painted the molding to match the stairs.
5. Install the Rug Pads
To add extra cushion to the runner, we decided to install a rug pad directly on the stairs.
We used blue painter’s tape to mark where the runner would lay on each step, then cut the rug pad using scissors to fit the marked areas. We secured the pad to each step with a staple gun.
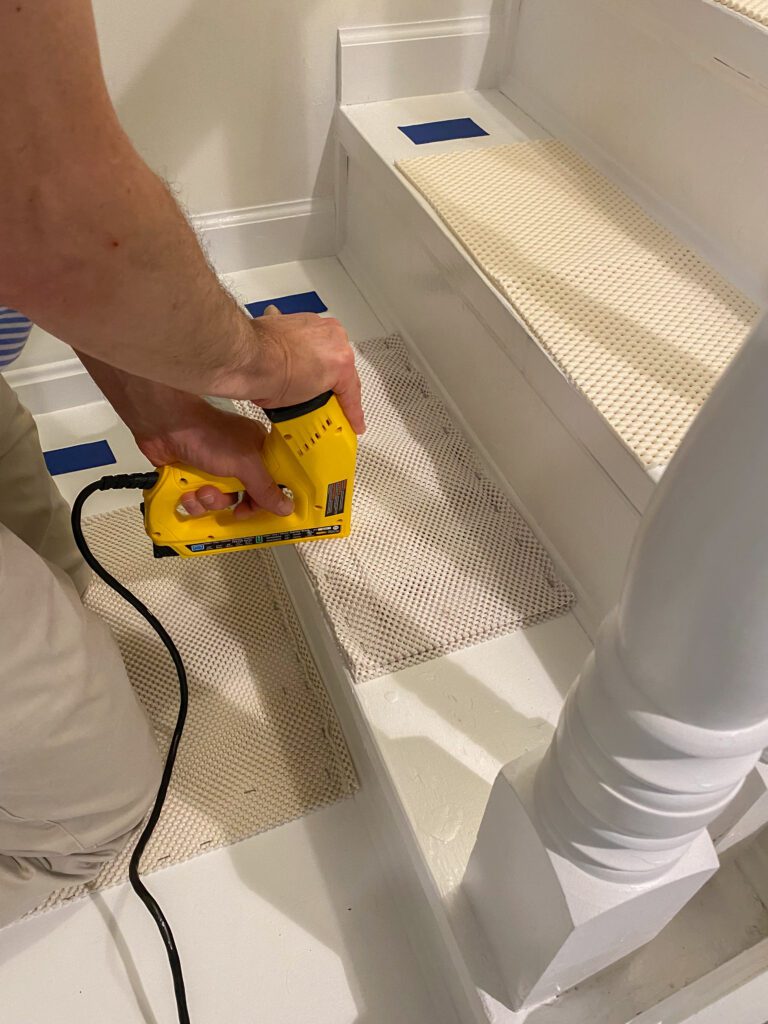
Alternatively, you can use double-sided carpet tape to attach the rug pads.
This step only took us a few hours, but it made a big difference in the quality of the runner.
Amazon
Stanley Staple Gun
Amazon
Rug Pad
6. Attach the Runner
Once the carpet runner arrived, it was time to install.
We started at the top of the stairs, using a staple gun to attach the runner on each step. On average, we used about seven staples for each riser and another seven for each tread (each staple was 4 inches apart).
Once we reached the end of the stairs, we had some runner leftover, so we just folded it and stapled it to the bottom of the last riser.
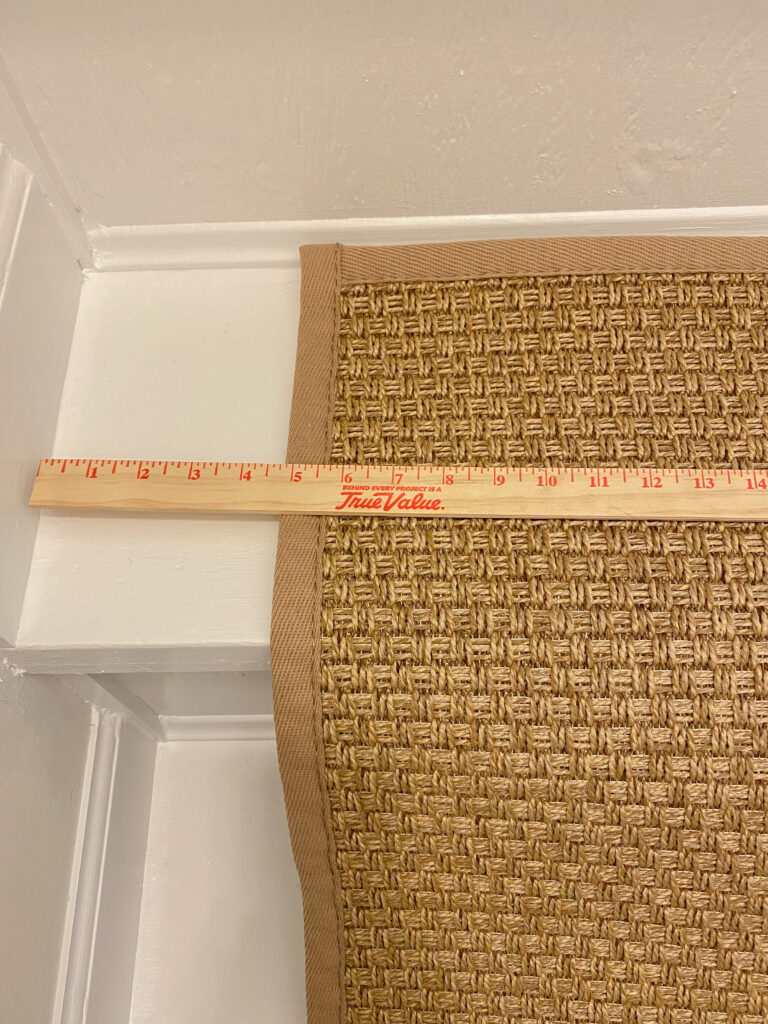
We highly recommend marking where to attach the runner with painter’s tape. Having that guide made the process so much easier.
Overall, the installation process took about one weekend of work and a few weeks of lead time for the carpet delivery.
After four years of constant foot traffic, our carpet runner still looks great! The SYNSISAL material is easy to maintain and looks brand new even after a lot of use.
We hope this step-by-step guide gives you the confidence to install your very own carpet runner. If you don’t feel comfortable with any of these steps, we recommend hiring a professional contractor to do the job (check out our top 6 tips for hiring a home improvement contractor.)
Happy DIY-ing!
This post is all about how to install a carpet runner on stairs.


