Kitchen Designing 101: How to Plan a Functional Layout
When it comes to kitchen designing, your layout is everything. It influences how you cook, host, clean, and navigate around your space. And while it may be tempting to jump straight into paint color samples and cabinet hardware selections (speaking from experience), none of those kitchen renovation choices matter if your layout isn’t functional.

When I designed my first kitchen in the early 2000s, I thought I had a pretty good understanding of how the space should flow. Spoiler alert, I didn’t.
My renovated kitchen featured a peninsula that caused constant traffic jams, awkwardly spaced appliances that made daily chores a mess, and limited countertop space that complicated meal prep and hosting.
After that failed kitchen design, I became laser-focused on layouts. Every inch of my kitchen had a plan and a purpose, and no corner was left untouched.
If you’re struggling to make sense of your kitchen layout or want tips to maximize functionality, this blog post is for you. I created an easy-to-follow kitchen designing roadmap that walks you through exactly how to plan a functional layout that aligns with your daily habits and your home.
From evaluating your routines to choosing the optimal appliance placement, this guide covers it all so you can focus on kitchen designing with confidence.

Design From the Inside Out
The first step is getting really honest about how you use your kitchen. Your habits dictate your needs, and your needs define your layout.
Map Out Your Daily Routines
Think about how your mornings start and how your evenings end. Do you cook most of your meals or order in? Are you constantly hosting friends and family or spending time outside the house? Do you kids do homework on the kitchen island or their rooms?
Here are some additional questions to get your brainstorm started. Let’s walk through a typical day in your life:
- Where do you prep your meals?
- What’s your grocery routine?
- Where does clutter collect?
- What areas are you cleaning the most?
- Which zones feel cramped or lacking?
- Which walkways cause bottlenecks or traffic jams?
Once you nail down the functional needs of your kitchen, the question of layout will become much clearer.
Determine Your Non-Negotiables
Kitchen designs always require trade-offs. Your budget, timeline, and “must-haves” won’t align perfectly, so you need to prioritize. Before you finalize your kitchen design ideas, create a list of “needs” and “wants”.
RELATED POST: 5 Jaw-Dropping Renovation Before and After Pics You Have to See to Believe
The needs are your non-negotiables. More cabinet storage for your cooking gadgets, ample countertop space for ingredient prep, or updated appliances that actually work.

Your wants are your “nice to haves”. Like that expensive backsplash tile that’s all over your Pinterest boards, the brass cabinet hardware you saw in Studio McGee’s latest project, or the trendy cabinet doors that add more aesthetic value than functional.
When your budget is at its max and you have to make hard choices, the wants are the first to go. Its sad, I know, but this process ensures you invest in the kitchen you need, and hopefully still get some “nice to haves” added to the mix.
Define Your Work Zones
Think about your kitchen as a collection of zones. Your 4 main zones are:
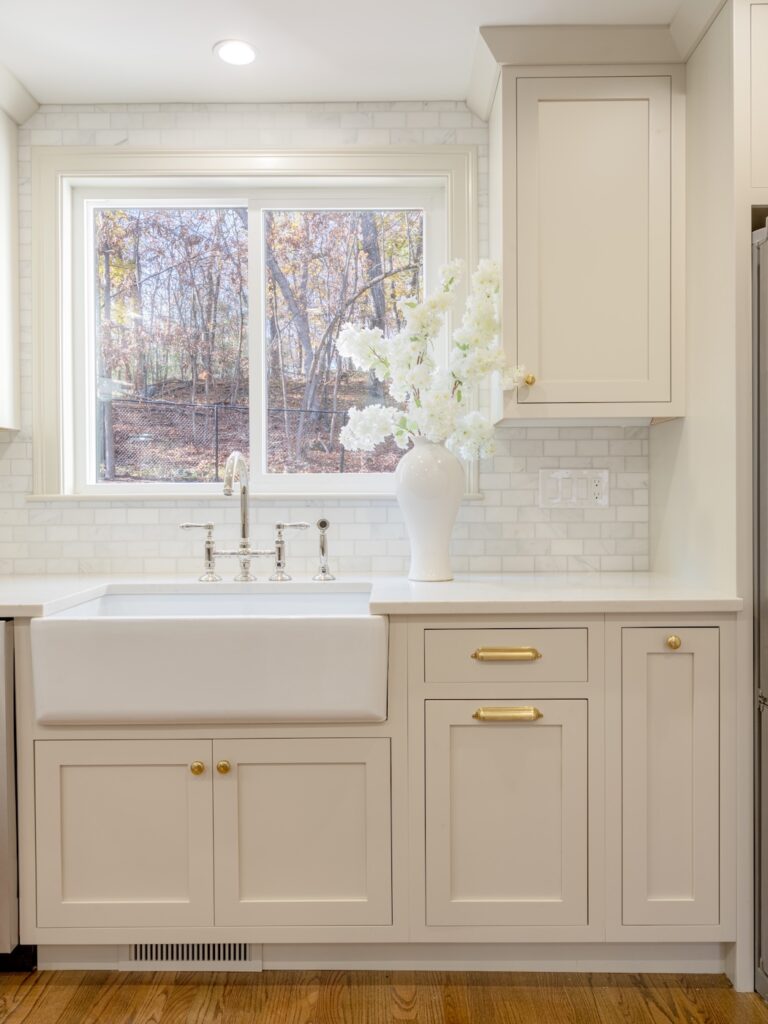
- Prep Zone: Largest stretch of counter space, ideally near the sink.
- Cooking Zone: Stove and range with surrounding landing areas.
- Cleaning Zone: Sink, dishwasher, trash, and dish storage.
- Storage Zone: Dry goods and pantry items, ideally near the fridge
Your zones will dictate how you put away groceries, prep ingredients, cook your favorite meals, and clean up after a long day. So it’s important to get them right. Map out the current zones in your kitchen and redistribute them for max efficiency. You want to minimize walking, reaching, and friction, and keep each task concentrated in one area. Future you will thank you!
Choose the Right Layout for Your Space
Your layout sets the foundation for your kitchen’s flow. This next step is all about choosing the configuration that optimizes how you work, clean, host, and gather around your kitchen.

Select a Kitchen Layout
Your kitchen can take on a lot of different shapes and sizes. Here are the main kitchen layouts to consider when planning your functional floor plan.
Galley Layout
Ideal for narrow spaces, like city apartments and condos. A galley kitchen features one or two parallel rows of cabinets that create a narrow, corridor-like workspace. Everything is close by, and the workflow is concentrated.
If you like to have everything within arm’s reach or you’re designing around a narrow space, the galley layout is for you.
L-Shape Layout
Perfect for open concept homes. An L-shape kitchen uses two perpendicular walls (or one wall plus adjacent cabinets) to form an “L” configuration. This layout creates a natural separation between work zones while keeping the spaces open and the walkways flowing.
RELATED POST: How to Start a Kitchen Renovation: 7 Steps to Success
If you want a kitchen that doubles as a cooking and entertaining zone, the L-shape layout is a great option for you. It’s flexible, functional, and easy to customize to your lifestyle.

U-Shape Layout
Better suited for closed concept homes, like traditional colonials or cape-style houses. A U-shaped kitchen wraps around three walls (or two walls plus a peninsula), maximizing countertop space and storage. If you like everything organized and contained, this layout delivers.
Island Layout (My Go-To)
Ideal for open concept kitchens with more square footage. An island layout includes a central workspace positioned separately from the perimeter cabinets. It creates extra prep space, storage, and seating. Think of the island as the anchor of the room.
If you want your kitchen to function as a multi-functional hub (prep, dining, hosting, homework station), the island layout is the best choice.
Peninsula Layout (My Nemesis)
By far my least favorite option. The peninsula extends from the perimeter cabinets to create a connected “island” without circulation on either side. In my opinion, the only benefit of the peninsula layout is the additional countertop space and maybe some extra storage.
But otherwise, it’s a traffic flow nightmare. Take it from someone who grew up in a peninsula household. Once you walk into the deadend, it’s hard to get out. The lack of circulation creates a bottleneck that only gets worse as the house fills up.
If flow is a priority for you, opt for an L-shape or island layout instead.

Create a Kitchen Design Drawing
Before you finalize your layout, sketch your design on paper or digitally to visualize how it will look in your home.
Take note of the wall measurements, window placements, door swings, ceiling height, appliance sizes, counter depths, walkways, and clearance zones.
I like to use graph paper for this step, but you can also use a kitchen designing tool like Floorplanner. I mention this kitchen designing software a lot here (unsponsored), but it’s for good reason. You can literally design any room in your house in just a few minutes.
Plus, you can visualize your space in 2D and 3D before committing to your layout. It’s a no-brainer.
Plan Your Cabinets Like a Designer
Cabinets come in a variety of different shapes and sizes, but selecting the right ones can feel overwhelming. Let’s simplify things. Here’s how to sort through your options so you can create a cabinet design that adds functional value to your kitchen.
Upper Cabinets vs. Base Cabinets
Upper Cabinets
Uppers are ideal for lightweight, everyday items that you want to keep within reach, like plates, glassware, mugs, spices, and pantry items. They maximize vertical storage without adding visual clutter.
Base Cabinets
Base cabinets offer larger, more versatile storage but require bending or kneeling to access the back. They’re best for bulky items that don’t need to be pulled out often, like baking sheets, pots, pans, and small appliances.
Pantry Placement and Food Storage Zones
You pantry should be positioned close to your fridge and prep zone. Because let’s be real: no one likes long walks across the kitchen or constant circles around the island. It breaks workflow and creates friction in your everyday routines.
Whether you opt for a cabinet pantry or a walk-in, make sure it’s in close proximity to your workzone to optimize functionality.
Kitchen Designing Ideas: How to Optimize Corners and Awkward Gaps
Corner spaces can make or break your kitchen design. Yes, they’re not the easiest to incorporate. But when it comes to kitchen designing, every inch of space counts.
Blind-corner pull-outs, lazy Susans, vertical tray storage, and narrow pull-out fillers can transform dead corners into usable, efficient storage.

Optimize Your Appliance Placement
Don’t overlook this step! Your kitchen appliances anchor your work zones, so plan their placement carefully.
The Kitchen Triangle Rule
The best way to plan your kitchen appliance placement is using the kitchen triangle rule. This framework connects the 3 main work areas (the sink, refrigerator, and stove) in a triangle formation.
The goal of the triangle is simple: keep your most-used zones close enough to simplify your routines, but far enough apart that your kitchen never feels cramped. Here’s how to plan out your perfect triangle to optimize comfort, movement, and efficiency:
- Each leg of the triangle should be between 4 and 9 feet long
- The total perimeter of your triangle is anywhere between 13 and 26 feet long
- No leg of the triangle should cut through an island or major walkway
- No triangle point should be blocked by appliance doors or obstacles
The triangle should support your natural rhythm of cooking, starting with the fridge, then the prep area and sink, and finally the stove.
Sink Placement
The sink typically serves as the anchor of the triangle because it supports both prep and cleaning. Place it where you have enough counter space on both sides and where you can easily move toward the stove or fridge without crossing through crowded walkways.
Refrigerator Placement
The fridge should be accessible without interfering with the cooking zone. Ideally, it’s positioned slightly outside the main prep area so someone can grab ingredients without getting in the way.
Avoid placing the fridge where the open door blocks entry routes or corners.

Stove Placement
You stove should feel protected from foot traffic but still integrated with the rest of the kitchen layout. It needs immediate landing space on both sides and should be positioned away from corners, major walkways, or doors. Hot pans and open flames don’t mix well with high-traffic areas.
Kitchen Designing for the Long Run
Your kitchen layout is the foundation for every decision that comes after it. So take your time with the kitchen designing process. Revisit your layout, refine your zones, and trust your (designer) instincts. They’re stronger than you think!
This post is all about simplifying the kitchen designing process!